Blog

  • Charlinarium 20 years later

    Charlinarium 20 years later

    I had a screen printing kit in our studio that was begging to be used, and coincidentally, I also needed to find some activity that competed with the kids tablets. Screenprinting was a good call because the kids had a great time at the Mini Maker Faire this year doing some seriography courtesy of Peach Beserk. So we spent the weekend learning about how to make prints, or in my case re-learning because it had been 20 years since I had done this.

    The kids made a Minecraft creeper shirt and a Lego Batman shirt, respectively. They also helped out my project, which is a mashup of Machinarium and Lucy about to pull the football away from Charlie Brown. Something about the somewhat gormless look on Machinarium’s protagonist’s face made it somehow easy to believe that he would duped into missing the football over and over again.

    Charlinarium t-shirt
    Charlie Brown Machinarium T-Shirt

    Instead of using photo emulsion, I simply plopped the heads on in photoshop, and then traced the outlines using screen filler resist. I didn’t want the image to be too “in your face” on the shirt, so shades of grey and white worked best for me. The result was “Charlinarium”, which will keep me going until if they ever come out with a Machinarium 2.

  • Using Amazon EC2 Linux for Vanilla Minecraft Server

    Using Amazon EC2 Linux for Vanilla Minecraft Server

    (Hey, I closed comments on my posts, but if you have follow-up questions about this, please contact me directly!)

    After months of begging, I finally caved in to my seven-year-old’s pleading to install a Minecraft server for her to use with her friends. Not only was I prompted by the challenge, but I also wanted an environment for the kids that I could keep an eye on (plus the endless begging wore me down, obviously). Originally, I was going to build a FreeNAS box and host it there, but a colleague at work suggested Amazon Web Services as a scalable, but easier alternative. While getting your own hardware is not wrong, I have to give a shout-out to Brent who led me to the alternative that (so far) works best for me.

    in office using minecraft server
    Minecraft Server fun

    Setting up the server was pretty straightforward: If you have an Amazon account (basically if you have ever bought any books and/or loot from Amazon) then you can use that to get the server. I used a Linux option which seemed to have Java already installed. I made sure the Linux instance was a t2.small instead of t2.micro to make sure there is enough wiggle room for memory (2GiB vs. 1GiB, although I might need more when the gang starts really hitting it, but this was the minimum even to get it going). Adding more memory changes the public IP because you have to stop and restart it. I also “IP locked” the server as a measure of security as well as whitelisting using the Minecraft admin commands. So really the game is double-locked, including whitelisting.

    Once I had the server instance running, I pretty much followed the steps to install PuTTY and WinSCP because I started on Windows OS at first. My goal was to be able to do everything from home, which is a Mac, which I managed to pull off by creating a .pem key from PuTTYgen in the Windows machine and then imported it into Cyberduck. Great video tutorial by Jhonny Fransis on it here, but getting that .pem key is “the key”.

    Along the way, I did get a “WARNING: UNPROTECTED PRIVATE KEY FILE!” error when using the Mac Terminal to get access to the server, but that was probably because I had the .pem file sitting in a Dropbox folder. Once I moved a copy to my local machine and pointed to that the error went away.
    Now that Minecraft is up and running using the tutorial here, the only three lines to get into the admin section of the Minecraft server are the following in Terminal (NB I changed some details around, but the format is right):

    ssh -i /Users/jlalonde/Documents/minecraft/jlalondekeypair.pem ec2-user@ec2-52-67-101-43.us-west-2.compute.amazonaws.com
    cd minecraft_folder
    java -Xms1G -Xmx2G -jar minecraft_server.1.8.1.jar nogui

    Note that not everything is perfect, and I still get booted out, sometimes, but I may increase the memory allocation, because it seems to work well enough that this is probably it. I am sure my test player will enjoy herself trying it out!

    Minecraft screen shot
    Hey look! An island! And adventure!
  • Gear box update

    Gear box update

    I manage to get some projects done relatively quickly while others tend to be a bit of a slow burn. My printed gear box has definitely been one of the latter. To recap, awhile ago I designed a gear box and engaged 3D Co. to prototype one for me. It works great, and I am a much bigger fan of the “measure thrice, print once” way of doing things, since it is exactly right on the first try. I think that’s part of what’s amazing about 3d printing, is that is comes out just the way you designed it, like magic.

    Next steps are to get the spring into the box so that when a wheel turns, it will move back and forth, similar to a doorknob. The movement in the box will not be very extreme; it will gently turn the potentiometer (see video for more explanation of this).

  • How I Manage oDesk Jobs

    How I Manage oDesk Jobs

    I’ve been introduced to a world of freelance developers in a whole new way via a website called oDesk. In it, you can either be a freelancer and search out contract jobs which match your skills, or post a job, big or small, for developers and freelancers to bid on. Because it is not tied down to a geographic location, it is a great opportunity to expand your pool of potential candidates (or jobs) worldwide.

    I’ve been actively using it for a few months and some days at work, it can take up most of my day. I also decided to use it to move ahead with the Cleeve Horne website: It was a site I had starting building but it was a big enough task that I got 90% of the way there and burned myself out on it. It’s hard to create quality work while sitting on a TTC bus riding to work.

    So it sat for a few months, eating away at me that I wasn’t going to get it done. Finally, I started breaking off pieces of what was left and gave it to some “oDeskers”. It’s not done, but as long as I can get some intrepid contractors to bravely traverse my spaghetti code, I can see the end in sight.

    From this I have a few tips for effectively managing your oDeskers. Some obvious, some not so much.

    Patience
    You’ll be dealing with contractors who may have a different mother tongue and have to figure out possibly fairly complicated stuff based on your instructions. Make things as easy as possible for them by explaining very clearly (ideally with screen captures or other examples) of what you need. Be kindly persistent if they don’t seem to be getting it right away.

    Get on DropBox (or Box.com), Skype, Team Viewer
    Since your contractors will be working remotely (sometimes very remotely, think overseas) you want basically a virtual communication and sharing arsenal that you can trade documents and coordinate. Team Viewer is useful if some kind of troubleshooting actually has to be done in your environment and you don’t want them to have your passwords.

    Close when done
    For a time, you may give your contractors access to your DropBox, or even password-related stuff (avoid the latter if you can). Do yourself a favour and close off their access when they are done the job, just to tie up loose ends.

    Find your ‘diamonds in the rough’
    The default, especially when starting out to hire, is to engage someone who has 1000+ oDesk hours and at least a 4.5 star rating. That’s a good strategy, but they are hot and priced accordingly. Alternately, you can track down hidden gems who are new to oDesk. They will be cheaper because they are just breaking in, and they will be eager to please to get some good ratings right at the outset. You can usually spot them by a strong portfolio and a believably strong C.V. Keep an eye out for bidders who fit that profile because people like that can really pay off. I recently found one for some SQL server work and he completely ninja-ed it faster than the other developers I had working in parallel to him.

    Happy oDesking!

  • 3D Printing a Gear Box

    3D Printing a Gear Box

    I don’t think it would come as a surprise to anyone that I have enough of an interest in 3D printing that I had to find some excuse to try it. That excuse finally came when, as part of a larger project, I needed to create a gear box. Besides the obvious (gears, duh) I wanted a pulley system to turn a potentiometer. For fear of jinxing my project I don’t want to get into to much detail, yet. In the meantime, here is the first part of how I came up with the gear box.

    I used free iPad software from AutoDesk called 123D Design. It was free/cheap and worked pretty well. The main limitations were that I ran up against some memory limitations: I have an older iPad 2 that doesn’t have tons of memory. So I made the mistake of dropping in a gear from their gallery and that caused the app to dump my project completely. Luckily I had been saving stuff up to the cloud (my project is located here) and managed to download a pre-gear back up and only lost about an hour of work.

    Total time to design this out was about six to seven hours. I might have trimmed that in half if I had avoided the aforementioned crash and also some of the backtracking that comes from looking at different versions to come up with what works.

    The next post on this should be how the print actually worked out in the end. Stay tuned.

  • Time Lapse Test

    Time Lapse Test

    On my bucket list are a few things: take a train across Canada; get a tattoo; scuba Tobermory and a few others (and I’d better start writing these down so maybe I can actually accomplish a few of them). One easier thing on the list is to experiment with lapse videos, preferably up at the cottage.

    As a proof-of-concept, I put together a short time lapse video. I actually started filming it a day later than I wanted, because the day before there had been a big melt and I wanted to capture the snow vanishing before our eyes. As it turns out, my backyard managed to hang on to the snow for awhile longer and in this video it worked out because of the beautiful shadows travelling across the ground.

    I ended up using a combination of iMovie (I have an old version – 8 – which didn’t do it all) and to supplement it using software suggested by Karsten Shluter which is JES Deinterlacer (see Karsten’s post here. The music is by Coeur de Pirate, who is a great one-woman-band from Quebec (check out her music).

    So here is the result embedded below. Seeing as this is an “easy once you know how” project, there will definitely be more this year.

  • Mini-economies of Long Branch

    Mini-economies of Long Branch

    Long Branch is a neighbourhood located in south Etobicoke, Toronto. The area has been through some challenges, with nearby big box stores on the Queensway wiping out a lot of the smaller shops located on Lakeshore Road. Plus the transition from manufacturing to gentrification has also created a neighbourhood in transition.

    Business clusters are interconnected businesses which operate in a complimentary fashion to one another. Walking around the neighbourhood, you notice some interesting business clusters which seem to be surviving by working around the typical big-box offering. What follows is a bit of a tongue-in-cheek look at what Long Branch has to offer from that perspective.

    One cluster of businesses has been what I call the motorcycle-tattoo-leather area, right around the local Tim Hortons. The centrepiece of this cluster used to be a Harley shop called Wildside Motorcycles, which unfortunately moved in 2013. Typical clients in this cluster are tattooed bikers, either riding in on their hogs or (if they live closer) walking their Rottweilers and stopping off for their double-double at Tim Horton’s. It will be interesting to see if this cluster survives, though, with Wildside Motorcycles moving out. Other businesses which complimented Wildside was the Great Canadian Tattoo Company and Terez Custom Leather. Optimistically, those businesses will continue to keep their clientèle, but I can see that removing Wildside may catalyze their closure, much like letting the air out of a balloon.

    Another cluster is what I will gently dub the “beauty hair salon cluster” which is simply because of the insane number of beauty parlours, hair salons, nail care and some spin-off businesses which include beauty supply stores and the like. There is a hair styling school near Kipling-Lakeshore, and as you go further west, there is no lack of hair salons to choose from (see map). This is because labour, in the form of student hairstylists, is cheap and that gluts the market. To be fair, further east near south Mimico has an even greater concentration.

    This all sounds painful, there are signs that things are looking up. A is Starbucks moving in two blocks from my house. Now, when I get caffeinated, I am pretty equal-opportunity in that I’ll go nearly anywhere. However, I’m sure there is a “Starbucks Indicator” that says something about neighbourhood gentrification based on if a Starbucks is present or not. So say what you will about Starabucks, but if they are willing to hang their shingle in Long Branch, then that’s a vote of confidence.

    Clusters I wish we had? My wish list is for something more interesting to go in beside the Home Hardware, that is to say, something else with a DIY aesthetic, like a Maker Space. Maybe even some kind of French-language cluster of daycares and book shops.

  • Toronto Elections data with Neo4j and Python part 3 of 3

    Toronto Elections data with Neo4j and Python part 3 of 3

    As the title suggests, this is the home stretch for my 3-part series on Neo4j and Python. This last bit is more Neo4j focussed, with Python doing most of the heavy lifting in the first two posts.

    Using a 2006 elections contribution dataset, I’ve loaded into Neo4j (2.0 Community Edition) the candidates, contributions, contributor names, postal codes. Additionally, I tried to get the distance between the postal codes for some geocoding. Now to try a few simple queries to test this out.

    The first one, is to see the top number of contributors by postal code, who they are and how much they contributed. In a normalized key-value schema this could be a number of joins, not to mention the added complication of ‘rolling up’ everyone’s names into one field. It can be done, but using Cypher, I found it a little cleaner. The use case for this is a candidate who might want to hit a large number of postal codes very efficiently in order to get the most potential donors and the most dollar amounts.

    Here is the query, and I’ll break it all down subsequently.

    MATCH (x:contribution)--(n:contributor)--(p:PostalCode) return distinct p.p_name AS Postal_Code, collect(DISTINCT n.contributor_name) AS List, sum(x.amount) AS Total_Contribution, count(DISTINCT n.contributor_name) AS Number_Contributors ORDER BY count(DISTINCT n.contributor_name) DESC LIMIT 500

    So the first match is to get the relationships between contributions to contributors all the way through to postal codes (“MATCH (x:contribution)--(n:contributor)--(p:PostalCode)“).

    The second part is returning what I want from that set of nodes:

    • p.p_name AS Postal_Code
    • collect(DISTINCT n.contributor_name) (I need the distinct, otherwise contributor names were double-counting if they contributed more than once.)
    • the total contribution for that postal code (sum(x.amount) AS Total_Contribution)
    • and finally the total number of contributors, which I order in descending order.

    contributorList1_Neo4j_part3

    That’s all well-and-good but what if I wanted to know what candidate they contributed to? Simple, I just add a Candidate node and pull candidate_name like the following:

    MATCH (can:Candidate)--(x:contribution)--(n:contributor)--(p:PostalCode) return distinct can.candidate_name, p.p_name AS Postal_Code, collect(DISTINCT n.contributor_name) AS List, sum(x.amount) AS Total_Contribution, count(DISTINCT n.contributor_name) AS Number_Contributors ORDER BY count(DISTINCT n.contributor_name) DESC LIMIT 500

    For fun, let’s see if there were any “divided” areas. That means areas that were hotly contested by two or more candidates. I used a similar ‘match’ statement, but instead returned a list of postal codes and candidates.

    MATCH (can:Candidate)--(x:contribution)--(n:contributor)--(p:PostalCode) return distinct p.p_name as Postal_Code, collect(Distinct can.candidate_name), count(Distinct can.candidate_name) AS Number_of_contributions ORDER BY count(Distinct can.candidate_name) DESC LIMIT 500

    I’d love to see the lawn signs in this neighborhood 🙂

    contributorList2_Neo4j_part3

  • Toronto Elections data with Neo4j and Python part 2 of 3

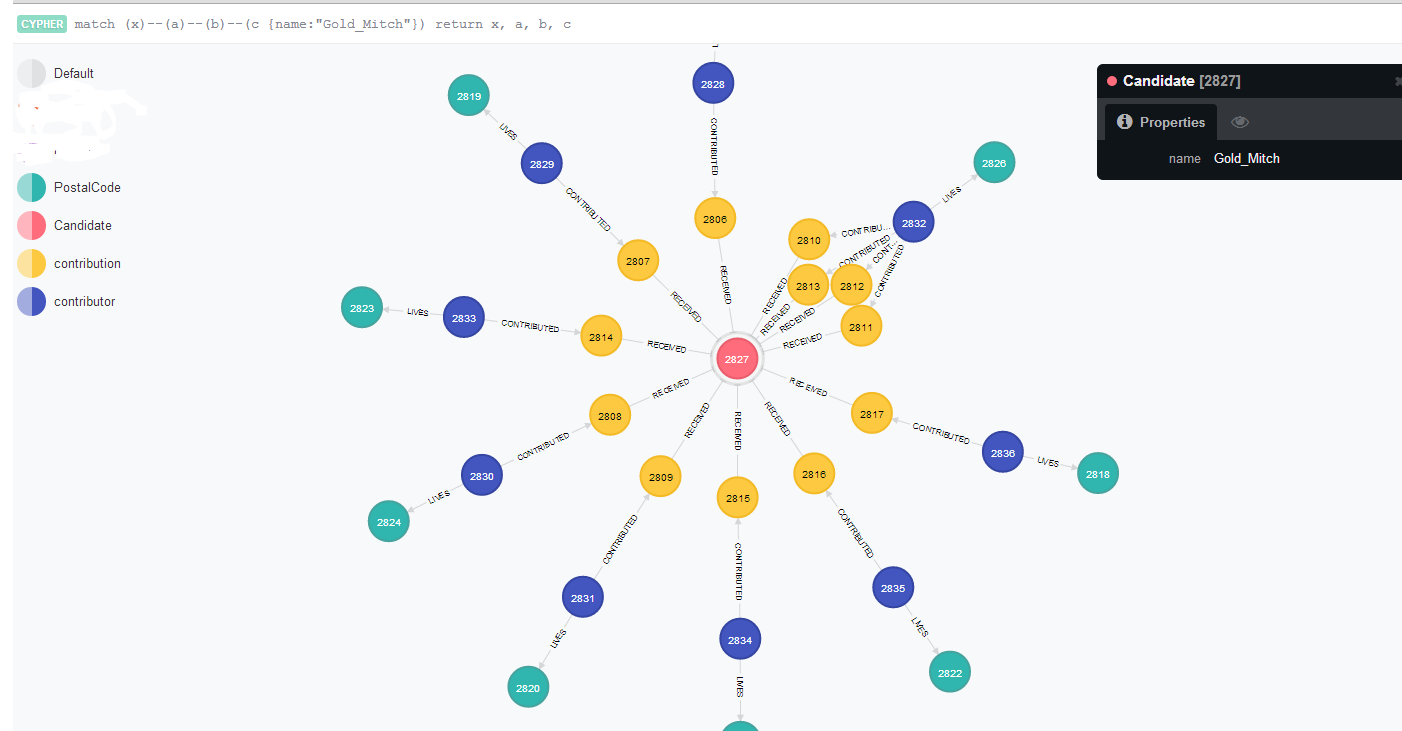
    In my last post, I took some campaign contribution data and plugged it into Neo4j using a sweet Python plugin called py2neo. Now we’re going to take that same graph and give it some added value, namely flesh out the geospatial aspect of it.

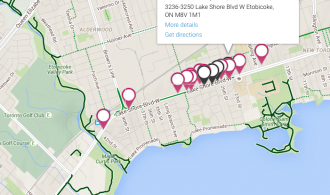
    Getting back to the example from last time, if you take a nice close look, you’ll see that there are postal codes. What’s missing?

    neo4j_elections_output

    ….that’s right: You have all these postal codes, but you can’t really do that much with them because you don’t have any distances between them. If you want to do any analysis around concentrations of neighborhoods, or if you are a candidate and want to save on travel time, it’s really hard to do the way it is, now. So let’s add some distance data between the postal codes and add it to our graphs.

    I decided to use the MapQuest API for this, mainly because the plugin (mapq for Python) is dead easy to get going. Unfortunately, I got some wonky results, probably because I didn’t have complete address data. If I was going to do this “for real” I would probably get better address data or use a plugin that can handle incomplete postal codes better.

    The steps are as follows (after you’ve created the graph, natch):

    1. Get your MapQuest API key
    2. Get a unique list of postal codes
    3. Loop through each postal code, getting the province and city data, if available
    4. For each postal code, get the longitude and latitude using the MapQuest API
    5. Using itertools, get all the combinations of coordinates, getting the distance for each
    6. Feed the distances for each combination into Neo4j

    Part 3 of this series is going to do some analysis using Cypher, but for now, let’s get the data loaded!

    import csv
    import py2neo
    from py2neo import neo4j, node, rel #this is a handy add-in for working with Neo4j
    import mapq
    import time ## Optional. Add this if you want to create a delay on the API call
    import itertools
    mapq.key('xxxxxxxxxxxxxxxxxxxxxxx')
    source = 'C:\Users\jlalonde\Documents\personal\elections\\tblMayor.csv' #obviously you want to adjust your path to suit what you need
    codes = [] #this is your list of postal codes
    coordinates = [] #this will be the postal codes, plus lat-lon
    distances = [] # this will be the final list of postal codes plus distances from one another
    fs = ['K','L','M','N'] #these will help to filter on Ontario postal codes
    x = 0
    with open(source, 'rb') as csvfile:
    #for this loop you just need unique postal codes. Let's do it!
    s = csv.reader(csvfile, delimiter=';')
    for row in s:
    #row[2] is the address, but it is not filled out most of the time
    #row[3] is the contributor postal code
    if row[11] == 'Gold, Mitch': #I'm just using Mitch Gold the candidate for this example.
    codes.append([row[3], row[2]])
    codes.sort()
    # print codes
    codes_unique = list(codes)
    codes_unique.sort()
    for p in codes_unique:
    if p[0][:1] in fs:#this is to distinguish between Ontario and Quebec
    prov = ', Ontario, '
    else:
    prov = ', Quebec, '
    if len(p[1]) > 1: #this asks if there is address data
    c = p[1].split(', ')
    city = ', ' + str(c[-1]) #if there is append the city
    else:
    city = '' #otherwise, leave this blank
    m = str(p[0]) + city + prov + 'Canada' #you are creating the
    # print m
    if x < 50: t = mapq.latlng(m) single = [p[0], t.get('lat'), t.get('lng')] coordinates.append(single) x = x + 1 #time.sleep(1) #a one-second delay for pinging mapquest API combinations = list(itertools.combinations(coordinates, 2)) print combinations

    Up until this point you now have all the possible combinations of postal codes, along with their longitude and latitude. Next up is to get the distances and then plug them in. FYI a BIG thank you and shout out to Michael0x2a for his code on StackExchange on distances.

    from math import sin, cos, sqrt, atan2, radians
    graph_db = neo4j.GraphDatabaseService()
    R = 6373.0
    for i in combinations:
    if i[0][0] != i[1][0]:
    lat1 = radians(i[0][1])
    lon1 = radians(i[0][2])
    lat2 = radians(i[1][1])
    lon2 = radians(i[1][2])
    dlon = lon2 - lon1
    dlat = lat2 - lat1
    a = (sin(dlat/2))**2 + cos(lat1) * cos(lat2) * (sin(dlon/2))**2
    c = 2 * atan2(sqrt(a), sqrt(1-a))
    distance = R * c
    #print "Result of ", str(i[0][0]), " to ", str(i[1][0]), " is ", str(distance) # from here you can see some distances are zero, which means bad data.
    #my guess is the Mapquest API is having a hard time with just postal codes being thrown at it.
    string2 = 'MATCH (p1 {p_name: "' + i[0][0] +'"}), (p2 {p_name: "' + i[1][0] + '"})'
    string2 = string2 + ' CREATE UNIQUE p1-[:ADJ {distance: ' + str(distance) + '}]->p2'
    print string2
    query2 = neo4j.CypherQuery(graph_db, string2)
    go2 = query2.execute()

    Below is Mitch Gold's campaign contributions, but this time with the adjacencies between the different postal codes.
    neo4j_elections_withAdjacency

    ...and here are just the postal codes using MATCH a-[:ADJ]->b RETURN a, b
    neo4j_elections_pCodes

  • Toronto Elections data with Neo4j and Python part 1 of 3

    As promised I am pushing the envelope on the 2006 Elections contributions datasets. This time I am going to do some analysis using Neo4j, but since the data needs to be loaded using the right syntax, I have a little preparation to do, first. Currently, my data sits in a csv file and looks like the following:

    1;Robichon, Georges; ;H3R1R3;H3R;Mont-Royal (Quebec);200.00;CT0001;Cash;CR0001;Individual;LeDrew, Stephen;1.00;Mayor;
    2;Rousseau, Remy; ;J4M2B3;J4M;Longueil (Quebec);1000.00;CT0001;Cash;CR0001;Individual;Pitfield, Jane;1.00;Mayor;

    The first column (in the above it is “1” and “2”) that is a unique ID I created for each donation. It will be useful for identifying unique contributions as we’ll see later. Here is my sketch as to what I need the Neo4j graph to look like:
    neo4j_elections_sketch
    So I basically need to create nodes and relationships for each donation, and put it into a text file. That text file can then be cut-and-paste or otherwise imported into Neo4j. There might be a better way to import, but there is some tricky conditional statements you have to make around contributors, because someone can contribute to a candidate multiple times and/or contribute to multiple candidates. As a result a ‘straight CREATE’ statement on each line will result in duplicate entries. (EDIT: I still ended up having duplicate nodes, which I had to delete but you get the idea.)
    EDIT: I tried out py2neo and liked it! Code is updated with latest version of this Python plugin.
    import csv
    import py2neo
    from py2neo import neo4j, node, rel #this is a handy add-in for working with Neo4j
    source = 'C:\Users\jlalonde\Documents\personal\elections\\tblMayor.csv' #obviously you want to adjust your path to suit what you need
    graph_db = neo4j.GraphDatabaseService()
    graph_db.clear()
    d = [] #complete dataset, that can then be sorted
    p = [] #this will be a unique list of postal codes
    c = [] #this will be a unique list of candidates
    cont = [] #this will help with checking duplicate contributors
    m=1
    with open(source, 'rb') as csvfile:
         s = csv.reader(csvfile, delimiter=';')
            #this next section creates nodes
         for row in s:
            if row[11] == 'Gold, Mitch':
                d.append([row[0], row[1], row[3], row[5], row[6], row[8], row[10], row[11]]) # this only collects the data you need for this demo
                #from the original data....
                # row[0] is the unique ID
                #row[1] is the contributor name
                #row[2] is the contributor address
                #row[3] is the contributor postal code
                #row[4] is the contributor postal code FSA
                #row[5] is the contributor location or neighborhood
                #row[6] is the amount
                #row[7] is the contribution code
                #row[8] is the type (usually cash)
                #row[9] is some kind of contributor code
                #row[10] is the contributor type (individual vs. corporation)
                #row[11] is the candidate name
            #the new rows in d (for reference)
            #row[0] is the unique ID
            #row[1] is the contributor name
            #row[2] is the contributor postal code
            #row[3] is the contributor location or neighbourhood
            #row[4] is the amount
            #row[5] is the type
            #row[6] is the contributor type
            #row[7] is the candidate name
    from operator import itemgetter
    d.sort(key = itemgetter(2, 1)) ##this sorts by postal code and by name
    for row in d:#in this instance you want to create a unique list of nodes for candidates and postal codes
        #you'll treat people differently, later.
        p.append(row[2])
        c_nospace = str(row[7]).replace(' ','').replace(',','_').replace('-','').replace('.','').replace('&','').replace('(','').replace(')','')##yeah yeah yeah I probably could have used REGEX here
        c.append(c_nospace)
        contribution_create, = graph_db.create(node(contribution_id = 'ID' + str(row[0]), amount=row[4]))
        contribution_create.add_labels("contribution")
    p2 = list(set(p)) #create a list of unique values of postal codes
    c2 = list(set(c)) #create a list of unique candidates
    for row in p2:
        postcode, = graph_db.create(node(p_name = str(row)))
        postcode.add_labels("PostalCode")
    for row in c2:
        #Adam Sit was a candidate and also someone named Adam Sit made a contribution. So I added the 'C_' to make sure there was no error.
    # f.write(write_can)
        candidate, = graph_db.create(node(candidate_name = str(row)))
        candidate.add_labels("Candidate")
    #now you can go through each line of the dataset, creating nodes if they are unique

    Now that I have created the array, I can continue by finishing off my creating the relationships and other nodes.


    #the reason why you have the next part is that someone could be donating to more than one candidate or to the same candidate twice.
    contributor1 = ''
    pcode1 = ''
    for row in d:
        contributor2 = str(row[1]).replace(' ','').replace(',','_').replace('-','').replace('.','').replace('&','').replace('(','').replace(')','')
        if contributor2 in cont and pcode1 != pcode2:
            contributor2 = contributor2 + str(row[0]) #this ensures there is no duplicate contributor names who are not the same person. Trust me.
        cont.append(contributor2)
        pcode2 = row[2]
        candidate = str(row[7]).replace(' ','').replace(',','_')
        if contributor1 == contributor2 and pcode1 == pcode2:
            ###if they are the same then you do not have to create a new node, just a new contribution
            ###if they are NOT the same then a new contributor node gets created
            ## you do this because you could have two people with the SAME name making a contribution. You figure this out by throwing the postal code into the mix
            string1 = 'MATCH (a {contributor_name: "' + contributor1 + '"}), (b {contribution_id: "ID' + str(row[0]) +'"})'
            string1 = string1 + ' CREATE UNIQUE a-[:CONTRIBUTED]->b'
            query1 = neo4j.CypherQuery(graph_db, string1)
            go1 = query1.execute()
            string2 = 'MATCH (c {contribution_id: "ID' + str(row[0]) +'"}), (d {candidate_name: "' + candidate + '"})'
            string2 = string2 + ' CREATE UNIQUE c-[:RECEIVED]->d'
            query2 = neo4j.CypherQuery(graph_db, string2)
            go2 = query2.execute()
        else: #here means the contributor is new. (1) Set up the contributor. (2) Set up their relationship with their postal code and their donation
            f.write('CREATE (' + contributor2 + ':contributor {contributor_name:\'' + contributor2 + '\', type:\'' + row[6] + '\'})\n')
            contributor, = graph_db.create(node(contributor_name = contributor2))
            contributor.add_labels("contributor")
            string1 = 'MATCH (a {contributor_name: "' + contributor2 + '"}), (b {contribution_id: "ID' + str(row[0]) +'"})'
            string1 = string1 + ' CREATE UNIQUE a-[:CONTRIBUTED]->b'
            query1 = neo4j.CypherQuery(graph_db, string1)
            go1 = query1.execute()
            string2 = 'MATCH (c {contribution_id: "ID' + str(row[0]) +'"}), (d {candidate_name: "' + candidate + '"})'
            string2 = string2 + ' CREATE UNIQUE c-[:RECEIVED]->d'
            query2 = neo4j.CypherQuery(graph_db, string2)
            go2 = query2.execute()
            string3 = 'MATCH (e {contributor_name: "' + contributor2 + '"}), (f {p_name: "' + pcode2 + '"})'
            string3 = string3 + ' CREATE UNIQUE e-[:LIVES]->f'
            query3 = neo4j.CypherQuery(graph_db, string3)
            go3 = query3.execute()
        contributor1 = contributor2
        pcode1 = pcode2
    f.close()
    v.close()

    EDIT: Post the nodes first (obviously) and make sure the nodes and relationships are in the same box when entering them. Don’t get caught like I did!

    Here is a screen capture of Mitch Gold’s network.
    neo4j_elections_output